

The number of WordPress themes available might be a bit daunting. They appear to be present everywhere you look. Most WordPress users currently prioritize responsive design, with other capabilities trailing closely behind.
Your website may become more appealing, and user-friendly, and increase visitor engagement by using the proper theme. Hence, in this article, I’ll be talking about 11 features that you should look out for when you’re in the market for a good theme for your website.
A WordPress theme is a collection of files that work together to create the style of your website. A theme contains template files, stylesheets, graphics, and perhaps JavaScript files. All of those files affect how your blog articles and pages are presented.
A WordPress theme serves as the foundation for your site’s general look. It directs the appearance, feels, and operation of your website, including color palettes, typography, page layouts, margins, header/footer placement, and more.
A theme allows you to manage the appearance of your site rather than just giving a look and feel to your blog. For example, suppose you have a pictures blog for your photography business, the correct theme will show your blog entries in a specific manner while providing an entirely different style for your store’s pages.
A WordPress theme includes template files as well as other sorts of files such as stylesheets, scripts, and graphics. Individual template files cannot be installed. They collaborate with the rest of the files of a WordPress theme to modify the appearance of your website.
Most themes, for example, include different template files for your site’s header, footer, sidebar, comments, and other areas. The template files aid in controlling the information presented as well as the layout of each page.
Simply put: If you’re looking to build a website from the ground up, you should begin looking for WordPress themes that will provide your site with the style and functionality you want as a company owner. After you’ve established the framework, you may begin to investigate customization choices via additional templates.
If you currently have a website design that you like but need more information, pages, or functionality, you’ll need a template to fill in the blanks. This might be a blog, a custom footer, a blog archive, or something else.
A theme is in charge of the overall look of your website. A template is used to determine the layout of a single page. Thus, themes feature a variety of templates.
Some of the best WordPress themes available for download include:
Turn on your notifications to be notified when I publish a comprehensive and extensive list of some of the best WordPress themes in the market.
Installing your selected WordPress theme on your site will allow you to customize the appearance of your website.
If you want to know how to install WordPress themes, read this article.
There are many website templates available online. Simply describe what you need and what you’re searching for as accurately as possible.
The next step is to select the template you like the most and fill it up. Your website may be up and operating quickly, even if it could otherwise take hours. All you have to do is add a few things, including the photographs you want to utilize and any other content you want to publish.
There are many affordable and free templates. The cost is inexpensive because you must modify the chosen template to fit your needs rather than paying someone to design a website according to your specifications. Custom websites might cost anything from $5,000 and $50,000 to build. For nonprofit organizations, this investment might not make sense.
Using premium themes is the preferable choice. The best feature of premium themes is that they are well made and affordable to everyone. When compared to having a website that is specifically developed, they are surprisingly affordable.
Theoretically, themes should be developed in a way that makes it possible for anybody to utilize them without any programming experience. All you need to do is just spend time modifying it to your needs if you want to include extra features like galleries, forms, social network buttons, and action buttons, among others. The functionality of the basic product is frequently designed to be compatible with third-party plugins and modules.
Let’s look at the most essential factors you must consider while choosing the ideal WordPress theme.
Responsive design is the top must-have feature for all websites in 2013, and it is also a must for WordPress themes. With the increasing number of people consuming information on tablets and mobile phones, it is critical to adopt a theme that allows consumers to clearly view material regardless of device.
Before you choose a theme, make sure it is highly responsive, whether you are opening a site on a smartphone or a tablet. Because the majority of people visit websites via mobile devices, it is critical that the theme does not impede access to your website’s mobile version.
The primary benefits of using a responsive theme are straightforward: there is no need to manage numerous sites and content, as well as visual and user interface uniformity across devices. Many of these responsive themes are based on Twitter Bootstrap, but there is a range of others available as well.
Because most individuals who buy WordPress themes have no CSS or HTML skills, it is critical to make the themes as user-friendly and WYSIWYG as possible. Business websites require a bit more since users will want to include buttons everywhere (like purchase now or call us button), incorporate testimonials into their pages/posts, build galleries, tabbed content…etc, etc.
A visual page builder can help with this. Builders, whether you like them or not, make it simple for anybody to design unique page layouts, headers, and footers. Yes, WordPress comes with Gutenberg by default, but it’s still restricted and tedious to use. This is why we recommend utilizing a high-quality page builder that is highly compatible. Most themes use:
Related: 7 Best WordPress Website Builders-No Coding? No Problem
Social sharing is essential in today’s web world, and themes must be extendable and adaptable in terms of the number of social networks supported. Facebook, Twitter, Google+, and Pinterest are examples of prominent social networking programs that should be included. Including social network share buttons on your website will improve its reach as sharing material becomes easier. If the theme you chose does not feature social media, you may always install the necessary plugins.
Related: How to Automatically Share Blog Posts on Social Media
Incorporating social media into a theme might help your material reach a wider audience by encouraging visitors to share it with their networks. These tools are incorporated into the finest and most popular themes without the need for plugins.
Using a pre-designed theme might make putting a site together faster and easier. Still, many individuals want to add their own flair, so personalization — from font to color to minor aesthetic tweaks — is crucial. The live theme customizer in WordPress 3.4 and later allows users to make these sorts of changes rapidly, by element and preview concurrently.
Themes may be modified in two ways: coding and non-coding (design). It is up to you, as the administrator, to decide what to do. Go for it if you are well-versed in coding. However, a word of caution: be mindful of the customization changes you make, or your website may wind up appearing sloppy. The second alternative is to seek themes that provide built-in plugin support so that you may personalize the website without using code Another alternative is that if you’re an accomplished designer, you may make your own themes in Adobe Photoshop and export them in PSD files, allowing you to modify not just the color but also the style and layout.
However, before you begin customizing, consider the user’s point of view. What do people want to see on the website? Is your website professional, clear, and straightforward, or is it cluttered? Is it also user-friendly? These minor details go a long way toward expressing your business and drawing a larger audience.
Plugins are software applications that enhance the functionality of a theme. A theme may be further adjusted to fulfill specific needs with the correct plugins.
Before you choose a WordPress theme, be sure that vital plugins may be added to it. Some themes come with their own set of plugins. Regardless, they must be compatible with the most critical third-party plugins.
Designers and publishers that release, support, and upgrade themes receive the greatest feedback and have the most recurring customers. These seemingly obvious elements are not as common as one might expect and are the foundation of establishing and managing a website.
Popular themes frequently offer thorough auto-update and update information in their descriptions, as well as specific and detailed instructions for use, installation, and customization. Even if a theme is visually appealing, it is customer service that sells (and maintains selling) themes in the long term.
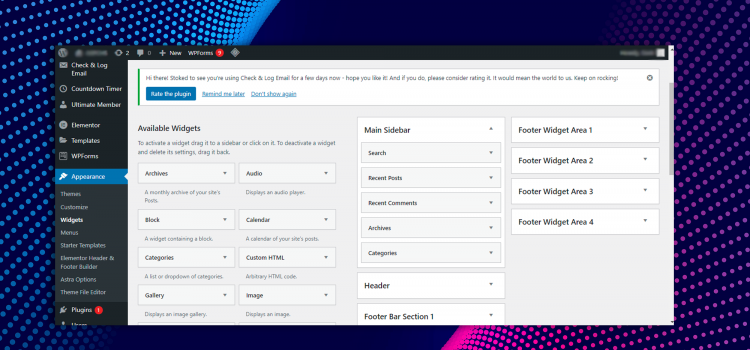
The location and arrangement of the theme’s options are critical, especially if you are new to WordPress development.
The options allow you to make changes to the theme, including easy customization. When it comes to settings, the best practice is to keep them in a readily accessible location.
Some terrible theme designers position the settings in various locations. This makes it difficult to learn how to simply alter the theme.
With a WordPress theme that offers a range of page designs, you may show your audience everything and everything you could possibly want to. Looking for a specific section for reviews and testimonials? Do you want a section with just blogs? Choosing a WordPress theme that enables you to have a lot of pages with various styles will give your site variety.
These many page designs are frequently included with well-known themes, making everything essentially “out of the box” ready to use. Every page has a unique design that keeps the site’s overall aesthetic while keeping the user in mind. These themes provide smooth page-to-page changes and give a site a more polished, professional appearance.
SEO (search engine optimization) determines how well a website ranks in search engines. Everyone is aware that search engines such as Google influence how successful a website will be in the future.
Read this article on simple SEO tips to improve your rank
When it comes to SEO ranking and optimization, the theme of a website is really significant. Search engine readability of website content, site performance optimization, indexable material, and support for additional SEO-specific elements such as Dublin core and microformats should all be included in themes. While these capabilities are crucial, you should also verify that your WordPress site uses a permalink structure for URLs and that custom and keyword-relevant slugs are used for page and blog articles.
So, before you choose a theme, make sure it is compatible with SEO plugins. Make sure SEO is mentioned in the theme’s feature list.
When selecting a WordPress theme, it will take care of the design, and WordPress plugins will handle any additional functions. You may use WordPress plugins to build a contact form for your website, gather leads, host contests, and much more.
Most WordPress plugins are supported by themes. However, if your theme is badly developed or if it adds too many functionalities akin to plugins, you can encounter a conflict and get WordPress issues. Additionally, you would lose such functionalities if you ever wanted to switch themes or modify the appearance of your website.
Make sure necessary plugins may be installed to the WordPress theme you choose. Some themes include their own plugins in the package. Despite this, they need to be compatible with the most crucial third-party plugins.
With more customers purchasing smartphones with HD and retina displays, picture and visual quality is more important than ever. This is also true for WordPress themes. The number of retina-ready solutions accessible is increasing on a regular basis, and this feature is becoming increasingly popular.
Themes that are retina ready will look great on any device. Not only will the visuals be clearer and crisper, but so will the typography. When zoomed in, retina-ready themes will have higher resolution and allow for more detail in the overall design scheme (or theme).
What may be fantastic for another website may be a complete flop for yours. Don’t just go with the flow when choosing a topic; instead, conduct your research and take your time. Make your website’s theme worthy because it will serve as the consumers’ first impression of your website and your online persona.
Do you have questions? Let us know in the comments!
If you’re looking to add CAPTCHA to your website, continue reading
Even if you are certain that your WordPress site is secure, you should still exercise caution. Your internet business may suffer permanent harm from a security breach. Bots are routinely used by hackers to flood your website with spam, which may rapidly become out of control.
Fortunately, a clever program can prevent spammers and bots from accessing your website. You can add CAPTCHA protection, which is an easy-to-use test that makes security possible for your website and adds an additional degree of security.
The phrase “Completely Automated Public Turing test to tell Computers and Humans Apart” is abbreviated as CAPTCHA. Thanks to CAPTCHA, which performs exactly what its name says, computers can tell the difference between automated and human users. These jobs can be completed quickly and effectively by humans, but an automated script could struggle.
The login and registration sections of your website may be attacked by bots, spammers, or hackers. Usually, their objective is to enter the office. Forms that ask for usernames and passwords are ideal entry points for hackers to employ. Many things might go wrong when an unauthorized user accesses your WordPress admin area, including, bringing down an online network, the spread of malware, cutting down on website traffic and causing harm to SEO.
When you add CAPTCHA to your website, visitors or form fillers would be presented with a quick puzzle to determine whether they are humans or not. These tests come in various forms like texts, images, etc. When the CAPTCHA identifies that the entry is from a bot, it’ll eliminate it from the total entries.
Users must comprehend distorted text or images using this popular CAPTCHA type in order to log in or finish a form.
One of the most well-known CAPTCHA tests is Google’s ReCAPTCHA, which employs human-assisted OCR. Users with visual impairments who are unable to recognize the scanned text might benefit from OCR (Optical Character Recognition). To assist persons who are deaf or hard of hearing in correctly completing the test, the OCR program offers an audio equivalent.
To get the most out of it, use it in conjunction with other plugins, such as contact form plugins. It’s an efficient and simple method for passing CAPTCHA tests. When a user submits an answer, the plugin uses response picture files to check that the answer is valid; if it is, the form can be submitted.
The user can’t do anything with noCAPTCHA or Invisible CAPTCHA. Instead, it depends on a person using your website frequently so that when they click links or other buttons, their authenticity as a human may be verified.
The display of several CAPTCHAs on the same page is possible, however, it’s typically overkill. In addition, after a number of failed tries, a dependent login can be formed and shown. You may also decide whether or not to display a CAPTCHA to visitors that are logged in.
The user is presented with one or more questions to respond to in a test of logic questions. Even seven-year-olds shouldn’t have any problem completing the questions because they are often extremely straightforward.
The use of text-based CAPTCHAs has gradually been phased out in favour of image-based ones. A picture is utilized to explain the concept rather than corrupted text.
Users must recognize a specific object in an image for image recognition to work. Typically, image-based CAPTCHAs require users to select photos that relate to a topic or identify those that don’t. Graphical elements like images of animals, shapes, or sceneries are used in these CAPTCHAs.
User interaction tests involve a straightforward activity, such as moving a slider across the screen. Even though it’s straightforward, computers have trouble passing this kind of test, making it practically a flawless method of website security.
The WP Forms Puzzle Captcha plugin is one of the best User Interaction CAPTCHA in the WordPress Library. In this plugin, which functions in the same way as the Simple Login Captcha plugin, a puzzle piece fits into a slot rather than a three-digit number. Because bots haven’t figured out how to answer these problems yet, it’s an excellent way to stop them from accessing your website.
There are several captcha plugins you can install. Check through the plugin library and choose the one you like. If you have Contact Form 7 already installed, you don’t need to install another plugin. All you need to do is
For the reCAPTCHA form,
In the new window, you’ll be provided with the Site Key and Secret Key.
With Contact Form 7, you don’t have to set up anything. It’ll automatically be active for all forms on your website.
Restricting access to bots and automated scripts is a crucial procedure for current WordPress websites. One of the greatest ways to stop such actions on your website is by using Google reCAPTCHA utilizing several WordPress plugins.
WordPress Widgets are elements you may use to create sidebars for your website (and maybe footers). They make it simple to add text, links, and different kinds of content to specified locations (determined by your theme). Although many sites can get by with only the basic WordPress widgets, you may always download more if you would like.
We will cover all the information you require regarding widgets in this article. This covers what widgets are, their applications, and available alternatives. Additionally, we’ll show a couple of plugins you may utilize to add even more widgets to your website.
WordPress is a user-friendly platform for all skill levels. WordPress makes it simple to modify your site to suit your demands, even if you lack programming experience and technical expertise.
One of the tools WordPress offers to achieve that is widgets. A WordPress widget is a pre-built module that adds certain functions to your websites, such as a search bar or a list of recently published articles. It may be included in one of the “widget spaces” on your website. These are often found in the sidebars and/or bottom and are determined by your theme.
Widgets may be added to your website using the WordPress Customizer as well. The only difference is that the procedure is carried out inside the WordPress Customizer. And one benefit of that strategy is that you can instantly see how your widgets will appear on the front end of your website.
Text Box: The first and most adaptable of these modules is the Text widget. There’s a space for a title, and then a miniature version of the WordPress editor to type your text. Using this widget, you can add nearly anything to your sidebar. You can use it to insert links to photos, videos, HTML codes and shortcodes of other elements and widgets. This makes it one of the most useful widgets in all of WordPress.
Search Bar: This widget is essential since it will provide your website with a fully working search bar. Offering a search option to visitors makes it easier for them to find what they’re looking for.
Recent Posts: this will update your widget area to include a list of your most recent posts. This is a clever strategy to entice readers to check out your most recent articles. You can specify a custom title, the number of posts to display (up to ten), and whether or not to show the dates for each post.
You can also add Widgets using plugins. These plugins give you more widgets than the default WordPress provides. There is probably a plugin out there that can assist you with whatever you’d like to accomplish with your widgets and sidebars. You may quickly perfect the customization of your widget spaces with a little work! Take your time and search through the plugins catalogue for the right plugin to suit your needs.
Website builders can also provide thousands of widgets, both free and paid. If you want to know the best WordPress website builders for both skilled and beginners, click here.
Widgets are crucial to any WordPress website and we hope you have some understanding of what they are and how to set them up. Do you have any questions? Let us know in the comments below!
In this article, we’ll look at how to create a contact form using Contact Form 7 and an integration plugin. Previously, we talked about creating a contact form for your WordPress website using WPForms. Contact Form 7 is a little complicated compared to the drag-and-drop WPForms builder. You’ll need to use the label HTML tag to use it effectively. This article will look at how to build a contact form using Contact Form 7 and an integration plugin.
Contact forms are useful in creating booking forms that potential customers can fill out without leaving the current page. It’s quick, intuitive, and gives you a better chance of converting a visitor.
Contact Form 7 is a free plugin that helps you create simple forms. You can request images, videos, and any feedback or answers you want. You can build multiple-choice fields, email, and phone number fields.
At this point, your form has been created. It’s time to set up mail delivery settings. Click on the Mail tab to reveal more options. Fill in the following fields in the Mail settings tab:
Contact Form 7 is not that easy to set up but once you get the hang of it, it’s all uphill from there. It has a lot of integration functionalities, mostly free compared to WPForms, which you need the paid version for. If you have any questions, let us know in the comments!
If you plan to sell products or services online, you need an eCommerce website. This website will allow users to view all products and make purchases using convenient payment methods. Having a WordPress website is the first step. If you don’t know how to, click here to learn.
If you already have your website, the next step is to make it eCommerce. To do that, you’ll need a plugin called WooCommerce. WooCommerce is the most popular and reliable eCommerce plugin in WordPress. It’ll give you many features such as adding products, categories, pricing, and payment options.
To install the plugin:
⦁ Click on Plugins in the Menu options and click on Add New submenu.
⦁ Search for WooCommerce in the search bar and click install.
⦁ Activate the plugin. After that, WooCommerce will appear in the menu.
⦁ On top of the screen, click on Run Setup Wizard to begin the initial setup of the WooCommerce plugin.
⦁ On the setup page, the first step is the Store Setup. Here, type the local shop address if it’s digital services. Type the country name, the currency you accept payments in, and the type of products or services you’ll be selling. If you’re satisfied with your inputs, Click on Let’s go!
⦁ The next step is to set up Payments. Check the payment methods you’ll accept on your website. You can use Stripe or Paypal. Customers can also make payments offline or in-person (i.e. payment on delivery). After setting up to suit your business, click Continue.
⦁ Now configure the Shipping settings of your webshop. Choose the type of shipping rate and type the amount. You can set that for areas your shipping service covers and areas not covered. Click Continue
⦁ The Recommended tab contains other great plugins suggested by WooCommerce that will improve your webshop experience. Check all the boxes next to the apps and click Continue.
⦁ The next step is Activate. Activate the Jetpack plugin by clicking Continue with JetPack. Create an account, sign in to JetPack, and you’re ready to go. Your eCommerce website is ready to launch.
To create a product:
⦁ Click Products in the left menu panel.
⦁ Select Add New
⦁ On the products page, write the product name as you want it shown to buyers.
⦁ Type the Product description in the paragraph box. Include all details that will inform a buyer’s decision to buy. Be truthful and accurate, as fraudulent information can turn off buyers and leave you with bad reviews.
⦁ You can also add a short product description for users who don’t want to read the full product description. It’s advisable to have both long and short descriptions to make a compelling case to buy the product
⦁ Upload a product image to the “Feature Image” section. You can also add multiple images to create a gallery
⦁ In the Product data settings, type the price of the product. If you’re running a sale, you can add the sale price.
⦁ If you have an inventory, you can state the number of stock for the product.
To add new products, repeat the steps above. You can edit products even after you’ve added them. You can also add categories if you sell multiple kinds of products. For instance, if you sell clothes, you may have different categories for girls’ clothes, boys’ clothes, etc. Doing this will help create orders for your shop. To add categories,
⦁ Click on Products > Categories
⦁ Type the name of the category and add a slug. The slug is what will appear in the link after the main domain name.
This tutorial should help you set up a basic eCommerce site. To add more features and functionality, check out WooCommerce shortcodes that will extend and expand your webshop. If you have any questions, let us know in the comments!
Want to learn more WordPress tips and tricks? Click here
Whether you’re looking for feedback or you want clients to contact you, forms can help your customers or potential clients reach you. This is useful if you don’t want customers to have direct contact with you or have your personal details. If you want to respond directly to customers on the spot, you can set up Live Chat by following this guide. You can also create forms using the methods we’ll discuss in this article.
The plugin we’ll be using for this is the WPForms plugin. You can get it here.
To create a Simple Contact Form using WPForms:
After creating your contact form, you want it to show on a page, say your Contact Us page or the home page. It’s simple to set up. To do so:
There you have it. It’s really that simple to create any form on your WordPress website. If you faced any challenges, or you have any questions, let us know in the comments!
When you run a Google Ads campaign, you hope that it reaches the goals you set for it. If that doesn’t happen, there’s no need to lose hope. Sometimes, all you need are some tips that will get your ad over the hump. I’ll discuss some of the best practices to employ in your Ad campaign that are tried and true and will yield results in next to no time.
Google Ads uses machine learning to match your campaign against the numerous similarly successful campaigns in their database. This AI then uses that to score your ads as they run currently out of 100%. Having an above 90% optimisation score is the best way to improve your ad performance. It doesn’t end there either. Google will send you recommendations based on what the AI thinks should increase your ads’ performance. These recommendations range from keywords addition or removal, keyword type, ad goal changes and bid strategies. Every one of them comes with an estimated percentage improvement, so you know how much a particular recommendation will affect your Optimisation Score. For instance, Google Ads may recommend changing all your Phrase Match keywords to Broad Match because that change will increase your Optimisation Score by 7%. So always make sure to monitor the Optimisation Score and check the recommendations for ways to improve your Google ads.
Ad Extensions are important because they allow you to insert extra information you couldn’t put in the ad copy. This information should ad more compelling reasons why someone should choose your business. Different extensions serve different purposes. You can manually add extensions or allow Google to automatically generate and include extensions in your ads when shown to potential customers. Ad extensions currently in Google Ads are Sitelink extensions, Location extensions, Call extensions, Callout extensions, App extensions, etc. You don’t have to use all the extensions, just those that will fit your business goals. Use Location, Sitelink and Call extensions if you want users to easily contact or find you without scanning through your website. Callout and Structured Snippet extensions to promote your products or services. If you’re trying to drive app installs, you can use App extensions so potential customers can click and download off the bat. If you aren’t using them, try adding extensions to your ads, and it will massively improve your chances of meeting your goals.
Responsive Search Ads are the new ad formats as of 2022. Google has stopped support for text ads as of June 2022. RSAs allow users to create different headlines (15 different headlines) and four descriptions. The trick here is to make sure your headlines and descriptions include some of your keywords. Create at least eight unique headlines to improve your chances of your ads being shown to potential customers. Google will generate three different ads based on different combinations of your headlines and description to create an ad that is likely to convert a potential customer. The best thing about RSAs is that Google gives real-time feedback on your ad structures; Poor for bad ads and Excellent for good ads. Google will also recommend titles based on your keywords. Always strive to make your ads “Very good” to have a successful overall Ads campaign.
Here are some other tips to help you improve your Google Ads reach
These tips should greatly help you in your quest to run a successful Ads campaign. No need to panic when you realize an ad isn’t performing well. Digital Marketing takes patience and time to get right so don’t be hard on yourself. If you need a professional to run your Ads for you, click here to get started.
Comments