All Phones in the EU will require USB-C, including all Apple Products- New EU Mandate.

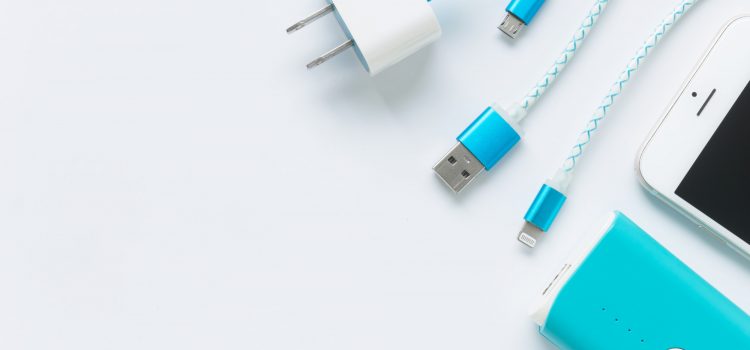
Legislators in the European Union have struck an agreement on legislation that will require all future cell phones sold in the EU to feature the universal USB-C connection for wired charging by the fall of 2024. This goes for the iPhone, which has been using the lightning port. Other electronic gadgets, including tablets, digital cameras, headphones, handheld video game consoles, and e-readers, will be subject to the ban. Laptops will be required to comply with the rule at some point in the future.

Parliament’s rapporteur Alex Agius Saliba (S&D, MT) said: “Today we have made the common charger a reality in Europe! European consumers were frustrated long with multiple chargers piling up with every new device. Now they will be able to use a single charger for all their portable electronics. We are proud that laptops, e-readers, earbuds, keyboards, computer mice, and portable navigation devices are also included in addition to smartphones, tablets, digital cameras, headphones and headsets, handheld video game consoles, and portable speakers. We have also added provisions on wireless charging being the next evolution in the charging technology and improved information and labeling for consumers”.

The EU’s implementation of a “common charger” is an attempt to reduce e-waste while also making life easier for customers. Lawmakers anticipate that in the future, phones and other electronic devices will not need to come with a charger because purchasers will already have the necessary components at home. According to the EU, the regulation may save customers millions of euros a year on “unnecessary charger purchases” and reduce e-waste by 11,000 tons each year.

Apple, which is the only major smartphone manufacturer that still uses a proprietary port (the lightning port) instead of USB-C, will be the most affected by the accord. Apple sold 241 million iPhones worldwide in 2021, with roughly 56 million shipped in Europe. Some of their lineups use USB-C though, like the iPad, iPad Pro, iPad Air, and iPad Mini. This mandate will only be in effect in European countries, but will Apple switch to the USB-C on iPhone units outside of the EU? Apple hasn’t revealed its plans.

According to the mandate, all phone manufacturers have 24-months to switch fully to the USB-C chargers for all the phone lineups being shipped to the EU.

According to the Verge, “Critics say the new legislation will stifle innovation by de-incentivizing manufacturers from developing improved charging standards. The EU denies this will be the case, and says it will update the legislation as new technology is developed.”

The next few months should be interesting, with the announcement of the new iPhone lineups on the horizon (iPhone 14, 14 Pro, and 14 Pro Max). Are they going to switch to the USB-C globally or are they going to ship different units with USB-C to only the EU while retaining the lightning port in other regions? We’ll find out soon enough.

Apple Launched iOS 16 this week. What’s in it for iPhone Users?


Earlier this week, Apple launched the new iOS 16, which is chock full of customization features. Apple in the past has never been forthcoming with personalization features, but for iOS, this may be the breaking of a new dawn.

The lock screen received an update in this iOS version; a complete overhaul of what used to be the standard lock screen on the iPhone over the last decade. In iOS 16, you can change the wallpaper, clock style, color, and font as you wish. There’s also an option to add and customize widgets. The personalization options are vast, and the revamped Wallpaper Gallery comes with the option to create and save multiple preset lock screens. You can easily switch to a different lock screen you desire at any point in time.

The lock screen can be linked to Focus mode, which means you can have a different preset lock screen for the different focus modes. You can have one each for Sleep mode or Work mode.

Notifications now do not take up the lock screen like in previous iOS versions. They are hidden and will only show when you swipe up on the lock screen. You can also swipe down to hide the notifications after viewing them.

iMessage Updates

iMessage also received major updates and overall quality of life improvements in iOS 16. You can now edit sent messages in iOS 16. There’s no need to panic after realizing you made a mistake in an already-sent message. I wonder how it is going to work out. Hopefully, there will be an indication that a message has been edited. You can also “unsend” a message, which will be deleted on both devices. This should come in handy when you text the wrong person.
You can also mark messages as read without scrolling through hundreds of group chat messages.

Dictation

The new iOS saw a massive improvement in the on-device dictation system. The dictation app will type out everything you say with incredible accuracy. The biggest plus is that the app will fix punctuations where the AI thinks it needs one using machine learning. You can also switch between typing and talking seamlessly in one document. These changes overall take text-to-speech to another level.

Other Updates

  • Live Texts is now available for video formats. Users can now copy texts that are seen in videos.
  • Ability to select objects from pictures to use as stickers. It does a good job of cutting the object from the background. The object can now be copied and pasted in chats, documents, etc.
  • The in-built keyboard now has a haptic touch.
  • General Apple Maps improvements
  • Quick Search on the home screen to search apps on your phone.
  • Newly revamped Wallpaper Gallery


Apple finally embracing and including more personalization options is good to see. That was one knock Android users never forgot to remind iPhone users. It’s still not to the level of Android 12 or even older versions, but I think Apple will gradually get there.

The Best Way to Set up Your eCommerce WordPress Website.

If you plan to sell products or services online, you need an eCommerce website. This website will allow users to view all products and make purchases using convenient payment methods. Having a WordPress website is the first step. If you don’t know how to, click here to learn.
If you already have your website, the next step is to make it eCommerce. To do that, you’ll need a plugin called WooCommerce. WooCommerce is the most popular and reliable eCommerce plugin in WordPress. It’ll give you many features such as adding products, categories, pricing, and payment options.

To install the plugin:

⦁ Click on Plugins in the Menu options and click on Add New submenu.

⦁ Search for WooCommerce in the search bar and click install.

⦁ Activate the plugin. After that, WooCommerce will appear in the menu.

⦁ On top of the screen, click on Run Setup Wizard to begin the initial setup of the WooCommerce plugin.

⦁ On the setup page, the first step is the Store Setup. Here, type the local shop address if it’s digital services. Type the country name, the currency you accept payments in, and the type of products or services you’ll be selling. If you’re satisfied with your inputs, Click on Let’s go!

⦁ The next step is to set up Payments. Check the payment methods you’ll accept on your website. You can use Stripe or Paypal. Customers can also make payments offline or in-person (i.e. payment on delivery). After setting up to suit your business, click Continue.

⦁ Now configure the Shipping settings of your webshop. Choose the type of shipping rate and type the amount. You can set that for areas your shipping service covers and areas not covered. Click Continue

⦁ The Recommended tab contains other great plugins suggested by WooCommerce that will improve your webshop experience. Check all the boxes next to the apps and click Continue.
⦁ The next step is Activate. Activate the Jetpack plugin by clicking Continue with JetPack. Create an account, sign in to JetPack, and you’re ready to go. Your eCommerce website is ready to launch.

Create Your First Product on your eCommerce site.

To create a product:
⦁ Click Products in the left menu panel.

⦁ Select Add New

⦁ On the products page, write the product name as you want it shown to buyers.

⦁ Type the Product description in the paragraph box. Include all details that will inform a buyer’s decision to buy. Be truthful and accurate, as fraudulent information can turn off buyers and leave you with bad reviews.

⦁ You can also add a short product description for users who don’t want to read the full product description. It’s advisable to have both long and short descriptions to make a compelling case to buy the product

⦁ Upload a product image to the “Feature Image” section. You can also add multiple images to create a gallery

⦁ In the Product data settings, type the price of the product. If you’re running a sale, you can add the sale price.

⦁ If you have an inventory, you can state the number of stock for the product.
To add new products, repeat the steps above. You can edit products even after you’ve added them. You can also add categories if you sell multiple kinds of products. For instance, if you sell clothes, you may have different categories for girls’ clothes, boys’ clothes, etc. Doing this will help create orders for your shop. To add categories,

⦁ Click on Products > Categories

⦁ Type the name of the category and add a slug. The slug is what will appear in the link after the main domain name.

This tutorial should help you set up a basic eCommerce site. To add more features and functionality, check out WooCommerce shortcodes that will extend and expand your webshop. If you have any questions, let us know in the comments!

Want to learn more WordPress tips and tricks? Click here

How to Create Forms on Your WordPress Website-2022

Whether you’re looking for feedback or you want clients to contact you, forms can help your customers or potential clients reach you. This is useful if you don’t want customers to have direct contact with you or have your personal details. If you want to respond directly to customers on the spot, you can set up Live Chat by following this guide. You can also create forms using the methods we’ll discuss in this article.

The plugin we’ll be using for this is the WPForms plugin. You can get it here.

To create a Simple Contact Form using WPForms:

  • Click WPForms > Add New in the left menu panel
  • In the new window, type the name of the form. Use a name that represents what the form should accomplish. (Eg. booking form to allow users to book service). This helps if you’ll be creating multiple forms.
  • You can select a template from the free collection. This will make it easy to set up. It’s also possible to start with a blank template. For the sake of this tutorial, we’ll go with the blank template. We’ll be creating a simple Contact form for any WordPress site.
  • On the left side of the window are all the fields you can add to your form. Some of the fields require you to pay for the Pro version. For a simple contact form, you have all you need. For names and addresses, you can use the “Single-line text field.”
  • Drag the Single Line Text field to the blank form. Click on it to edit. Change the Label to “Full Name” or “Name”. You don’t need to add a description since it’s self-explanatory. Only use descriptions to elaborate on fields that you think can be misconstrued.
  • Since customer names are important, click on Required? to make the field compulsory to fill. Do that for all fields you think are needed when filling the form.
  • Click Add field again. Next, drag the email field to the blank form below the Name field. Click on it to edit as well.
  • Change the Label if you want to. You can also click on Email confirmation, which means users filling the form will be asked to repeat their emails to continue.
  • Now add the Numbers field. Edit the label and change it to “Telephone” or “Phone Number”.I’ll advise using this for local numbers in your country.
  • Add a Paragraph Text field next. This will serve as the area your site visitors can type out the reason for contacting you.
  • Change the label to “Message”.
  • For other fields like checkboxes and multiple-choice fields, you can use that if you have specific subjects you want the person filling the form to choose from. For instance, with the Multiple choice field, you can label it “Subject” and add options like “Support”, “Suggestions”, “Wrong order”, “Order not fulfilled”, etc. Thus, site users must select one of them. You can also make them the required fields if you please.
  • Click Settings on the left menu panel for general form settings.
  • In the General tab, Add a form description. This will tell people what the form does. You don’t need to do this for Contact Forms since the name is self-explanatory. No need to mess with the Advanced section
  • Under the notifications tab, you can type the email you want to receive from inputs. By default, they’ll be sent to the site email. If you want to use another email, type that in the field provided.
  • Edit the Email subject line, “From Name” and “From Email address” fields. From Name field can be for the name of the website, and the “From email” could be the site email. Make sure whatever email you use is accessible. That way, you will receive all form updates.
  • In the Confirmations tab, edit the confirmation email that the visitor will receive after they fill out the form. You can leave the default template. It works fine.
  • Click on Save on the top right-hand side when you’re done creating. At this point, you have successfully created a contact form. Click on Preview to see how the form will look to visitors.


After creating your contact form, you want it to show on a page, say your Contact Us page or the home page. It’s simple to set up. To do so:

  • Click on the </> Embed button. A dialogue box will appear.
    Select “use a shortcode.” It’s much easier to integrate using shortcodes. It will not mess with the structure of the page.
  • Copy the shortcode displayed. (like [wpforms id=”39″ title=”false”] )
  • Go to the Pages menu and click on the page you want the form to be placed. With whatever builder you’re using (whether block editor, elementor, WPBakery, etc.), create a new section.
  • Depending on the builder, you may have a shortcode widget. If you don’t, you can use the text block widget to do this as well. Add the widget to that section.
  • Paste that code in the widget option and click Apply. You don’t have to keep pasting the shortcode after every change. Your form will be updated each time.

There you have it. It’s really that simple to create any form on your WordPress website. If you faced any challenges, or you have any questions, let us know in the comments!

How Can Dropshipping Make You Money In 2022?

In this blog, we’ve looked at different ways of making money online. Today we’ll be looking at what Dropshipping is, and how you can use it to earn passive income on the internet. Dropshipping is a business model in which entrepreneurs sell products manufactured, warehoused, and shipped by a third-party company from their webshop.

It is a low-risk low-capital business model that ensures entrepreneurs can make money online without having to spend money and time marketing or promoting products.

This model is not to be confused with standard retail models. The major difference is that the entrepreneur using dropshipping doesn’t have to own a shop or have the items. They’ll order the product from the third-party company and ship it to the address of the buyer.

How Does Dropshipping Work?

  • A customer buys a product from your online store
  • Your dropshipping supplier will receive an order automatically from your store
  • The supplier will then prepare the order
  • The product is then shipped to the buyer’s address by the third-party store.

What are the benefits of Dropshipping?

With drop shipping, there is reduced upfront capital involved when starting. You don’t need to invest a lot of money in inventory. You don’t buy products until you’ve made the sale and the customer has sent payment. This also means there’s little risk involved compared to starting your standard retail shop.

Since it’s strictly online, entrepreneurs don’t need to worry about an official office space or shop. Once you have an internet connection, you’re good to go.

It is also easy to start. As mentioned earlier, there’s no need for inventory or warehouse storage so you don’t have to set all that up before starting. You don’t have to worry about delivery, tracking and returns handling. This makes it easier than a conventional eCommerce venture.

Cons of Dropshipping

You may have to constantly deal with low margins. If you find yourself in a competitive niche, other dropship entrepreneurs tend to set their prices at the lowest possible prices because they didn’t invest in inventory.

You don’t have control over the stock of products. Thus you can’t tell if a product is out of stock until the shop updates the product status. For instance, someone may pay for a product from you. If the drop ship supplier doesn’t have said product, the whole deal is ruined.

Supplier errors are out of your control. If there are order misses, bad packaging or wrong products, you will have to take full responsibility. Multiple times and this can tank your reputation as a business.

To be successful in this venture:

Find a lucrative niche.
There’s a strong probability that other merchants will sell your products unless you’re dropshipping private-label goods or utilizing a print-on-demand business strategy. So how can business owners stand out in a competitive industry? They achieve this by locating a profitable dropshipping niche.

An area of a broader market known as a niche market is distinguished by its particular demands, preferences, identity, or interests. Niching allows smaller enterprises to lower the amount of rivalry that prevails in markets when commodities are widely accessible. While you don’t want an overly populated area, finding a niche with a good number of searches can help you make money without too much competition. You can use keyword tools to search for a lucrative niche.

It’s time to look for dropshipping suppliers. There are some suppliers online that will help you start drop shipping.

  • Shopify
    When you use Shopify to sell drop-shipped goods, information about your orders is given to your third-party supplier for shipment. The supplier identifies the transaction as complete and, if available, can add a tracking number before sending the order straight to your consumer.
  • Spocket
    Products from dropshipping vendors in the US, Canada, Europe, Australia, Brazil, and other countries are available on Spocket. Users may import items straight into their Shopify stores thanks to the app’s connection with AliExpress.

There are others like Modalyst and DSers, which provide great dropshipping services.

Now it’s time to build an e-commerce site. If you want to learn how to make your website eCommerce, read this article. After creating the site, you can import products from the dropshipping supplier’s app to start selling on your site. Shopify makes it easy to import products from other online shops like AliExpress.

Take your time and do your thorough research before you start dropshipping. Look at your margins, be flexible and be willing to learn and make changes to your business model. Dropshipping is definitely a great way to start earning money online.


Top 5 Android Apps to improve your Life/Phone Experience


There are numerous Android apps in the Play Store and thousand more not listed in the store. In this article, I’ll talk about three apps that will improve your Android experience and enhance your life. I’ve personally used these apps for extended periods, so what I’ll write is based on my experience with said apps.


Samsung Health

As is said often, health is wealth. No app encapsulates that better than the Samsung Health app. Other Android health apps like Google Fit and Huawei do a great job, but personally, I can confidently say Samsung Health has more features and is consistent. First off, the Samsung Health app tracks the number of steps taken in a day. You can set a personal daily goal to try to hit intentionally, improving your general health. You can also compete with other users with the app.

 If you’re trying to monitor how you eat, then this app is the best for you. You can set a calorie daily limit and log your meals for the day. Based on calculated calories for different food items, the app will state your calorie intake at the end of each day. It is not accurate, but it will give you an idea of the ballpark your calorie intake is in. The Samsung Health app tracks your sleep and summarises your sleep stats over any desired period. 

 As an added bonus, if you’re using the Samsung S8/S8 plus, which came with the heart rate sensor, you can use the app to check your heart rate and stress levels. If your stress level is high, there are breathing exercises you can do.

Do you want to keep fit through exercises? The Samsung Health app has many exercise videos with timers, simulating the experience with an actual trainer. It’ll keep a calendar of your rest and workout days, monitor days you completed workouts, and remind you to start your exercise on scheduled days. When it comes to Android apps in this field, Samsung Health blows the rest out of the water.


OneNote

The stock Notes apps on most phones are not great. While I have an article detailing how great WhatsApp can be as a Notes App, OneNote is one of the best free notes Android apps I’ve used. My experience with OneNote began with my first Microsoft Lumia Phone in 2016. In 2022, I have all my notes from back then because the OneNote app saves your notes in the cloud. So regardless of the number of times you change devices, once you log in to your Microsoft account, you’ll have access to all your notes. You can attach pictures, locations, music, and voice notes to a document with little to no issues. This app includes a handwriting feature that allows you to make notes with a stylus or your finger (not ideal). This is rare in most Android apps. This feature mimics traditional note-making and will suit people who cherish writing with their hands. One perk this note has over other Note Apps is the synchronisation across devices concurrently. If you have a Windows PC, you most likely have the Microsoft Office apps, which include OneNote. This means you can switch from your phone to PC seamlessly.


expressPay Android App

ExpressPay is a finance app on the Play store that caters for all payment needs in Ghana. It links with all viable payment methods in Ghana like Vodafone cash, MTN Mobile Money, AirtelTigo Money, VISA cards, etc. You can send money and airtime credits to friends and family. The catch here is that you can save the contact information of people you usually send money to. In that case, the next time you send money, you save yourself a few clicks and having to temporarily memorize the number. You can also send money to and from your VISA card without any issues. You can save your visa card information on the app, therefore only needing your fingerprint to confirm payment without typing out the card details every single time. 

 You can also pay all bills under the Ghana sun. You can pay light and water bills, DSTV and GOTV subscriptions, and top up your Shell Card. You can make payments for reservations in popular hotels in Ghana and even pay tithes in listed churches in Ghana. I think expressPay is the best fin-tech Android app in Ghana.


ForceLTE Only

As the name suggests, the ForceLTE app will let you keep your phone network on LTE or 4G at all times. In Ghana, we don’t get a stable network from these Internet Service Providers, like Vodafone Ghana or MTN Ghana. This, therefore, makes working online stressful, especially in the afternoons. Thus, this app is a god-sent. It works perfectly for all android phones, even phones with Android 12. The disadvantage to this is that you won’t be able to make or receive calls when the 4G only mode is on. So you have to use it wisely. If you know for sure you may be receiving important or urgent calls, don’t turn it on. Also, don’t forget to turn it off when you’re done. This app improves your browsing experience massively and I recommend it to people who live in areas where a sustainable 4G network is a myth.


Download Twitter Videos

How many times have you seen a video on either Twitter or Instagram that you would’ve loved to save on your phone? Because this function doesn’t exist, people resort to Save Video bots on Twitter to get a download link. Well, you don’t have to do that anymore. With this app, all you need to do is tap on the Share button, and select this app. Once the app opens, you would be asked to choose the video resolution you want and the app will automatically begin downloading the video. This app is such a hassle-free experience, and you get to download any video on Twitter. Works for Instagram too despite the name, but you have to log in every time, so I wouldn’t recommend it for Instagram. 

Give these apps a shot. These Android apps make life easier and generally better. If you have any app recommendations, please let us know in the comments.

Check out these articles:
Apple Launched iOS 16 this week. What’s in it for iPhone Users?

Google Meet and Duo are Merging. What Does This Mean For Users?

Google Meet and Duo are Merging. What Does This Mean For Users?

For the longest time, we’ve had Google Meet and Duo on the same phone though virtually, in the long run, did the same things- video and voice calls. The Duo app has a “social media” feel, allowing users to straight-up call other Android users with the app in their contacts. Google Meet is a more consumer and workplace-focused app for video and voice conferencing. Google announced in their recent official blog post that there are plans to merge Google Meet and Duo in the coming weeks.

Google Duo hasn’t been as successful as its competitor, FaceTime. In Android, there are easily better voice and video calling apps in the Play Store (like WhatsApp, Facebook, etc.), rendering it impossible for Duo to ever have a chance of making it to the top. Google Meet, on the other hand, saw a lot of traction over the last year. Hence it makes sense to merge the two and see how far it reaches. Google hopes to make the Meet App more than a formal meeting app.

According to Google’s blog post, “In the coming weeks, we’re adding all the Google Meet features to the Duo app, so users can easily schedule a video meeting at a time that works for everyone or continue using video calling to instantly connect with a person or group. Later this year, we’ll rename the Duo app to Google Meet, our single video communications service across Google that is available to everyone at no cost.”

The Duo app will be fused with all the features that make Google Meet great while continuing to provide updates to improve the overall experience. Subsequently, the Duo app will be renamed “Google Meet”, and the original Meet app will be renamed “Google Meet Original” before being eventually taken down. Since the Duo app is an in-built app in the Android OS and with over 5 billion downloads, keeping the Duo app means having the newly-merged app on more Android users’ phones. This change Google hopes will provide users with a single solution service for both video calling and meetings with people across their lives.

In June, Google will be rolling the following updates:

  • Customize virtual backgrounds in calls and meetings
  • Schedule meetings so everyone can join at a time that’s convenient for them.
  • In-meeting chat for deeper engagement
  • Live share content to enable interaction with all participants on the call.
  • To improve accessibility and engagement, get real-time closed captioning. Increase the number of participants on video calls from the existing limit of 32 to 100.
  • Integrate with other tools, including Gmail, Google Calendar, Assistant, Messages, and more.

Hopefully, the merger will be as smooth as Google promised. This is a welcome change as the original Duo app continually lost its relevance in the Android space. Handled well, we’re looking at one of the best video calling apps in the Android world. Will it surpass Zoom or FaceTime? Time will tell.

Best Practices For a Successful Google Ads Campaign-2022


When you run a Google Ads campaign, you hope that it reaches the goals you set for it. If that doesn’t happen, there’s no need to lose hope. Sometimes, all you need are some tips that will get your ad over the hump. I’ll discuss some of the best practices to employ in your Ad campaign that are tried and true and will yield results in next to no time.

Optimisation Score

Google Ads uses machine learning to match your campaign against the numerous similarly successful campaigns in their database. This AI then uses that to score your ads as they run currently out of 100%. Having an above 90% optimisation score is the best way to improve your ad performance. It doesn’t end there either. Google will send you recommendations based on what the AI thinks should increase your ads’ performance. These recommendations range from keywords addition or removal, keyword type, ad goal changes and bid strategies. Every one of them comes with an estimated percentage improvement, so you know how much a particular recommendation will affect your Optimisation Score. For instance, Google Ads may recommend changing all your Phrase Match keywords to Broad Match because that change will increase your Optimisation Score by 7%. So always make sure to monitor the Optimisation Score and check the recommendations for ways to improve your Google ads.


Ad Extensions

Ad Extensions are important because they allow you to insert extra information you couldn’t put in the ad copy. This information should ad more compelling reasons why someone should choose your business. Different extensions serve different purposes. You can manually add extensions or allow Google to automatically generate and include extensions in your ads when shown to potential customers. Ad extensions currently in Google Ads are Sitelink extensions, Location extensions, Call extensions, Callout extensions, App extensions, etc. You don’t have to use all the extensions, just those that will fit your business goals. Use Location, Sitelink and Call extensions if you want users to easily contact or find you without scanning through your website. Callout and Structured Snippet extensions to promote your products or services. If you’re trying to drive app installs, you can use App extensions so potential customers can click and download off the bat. If you aren’t using them, try adding extensions to your ads, and it will massively improve your chances of meeting your goals.


Responsive Search Ads

Responsive Search Ads are the new ad formats as of 2022. Google has stopped support for text ads as of June 2022. RSAs allow users to create different headlines (15 different headlines) and four descriptions. The trick here is to make sure your headlines and descriptions include some of your keywords. Create at least eight unique headlines to improve your chances of your ads being shown to potential customers. Google will generate three different ads based on different combinations of your headlines and description to create an ad that is likely to convert a potential customer. The best thing about RSAs is that Google gives real-time feedback on your ad structures; Poor for bad ads and Excellent for good ads. Google will also recommend titles based on your keywords. Always strive to make your ads “Very good” to have a successful overall Ads campaign.

Here are some other tips to help you improve your Google Ads reach

  • Do not use one type of keyword. You can combine Phrase, Exact and Broad Match keyword types to improve ad relevance on Google Ads
  • Use single keyword-themed ad groups that will tie multiple keywords into one theme for an ad group.
  • Use a Performance planner monthly to forecast how campaigns would perform in different conditions.
  • Improve your landing page experience. Make sure all texts are clear, and the website is easy to navigate. A poorly structured website will deter potential customers from patronizing, and eventually, your ads will perform poorly.
  • Check the performance of your keywords religiously, and remove redundant or poorly functioning keywords to help manage your budget properly in Google Ads.

These tips should greatly help you in your quest to run a successful Ads campaign. No need to panic when you realize an ad isn’t performing well. Digital Marketing takes patience and time to get right so don’t be hard on yourself. If you need a professional to run your Ads for you,  click here to get started.

SEO Optimisation 101- Best SEO Practices for your Blog/Website


The fastest way to improve your organic rank on search engines and drive traffic to your website is through SEO. SEO (stands for Search Engine Optimisation) is a collection of processes that drive traffic from free and organic search results on search engines. Popular search engines include Google, Bing and Yahoo. Improving the SEO on your website means organically improving your positions on these search engines. People rarely go past the first results page since that page will most likely have what they are searching for. While you may want to try Google Ads, organic rank is free, and therefore it’s worth it to improve your position. So for businesses and blogs trying to gain traction on their websites, this article will explore the best SEO practices to yield great results.


Have a Focus Keyword

When you publish an article for your blog, it usually has a general idea you’re trying to pitch, just like this article. I’m writing about SEO, which has been clear to this point because human beings can deduce intent without sufficient data. However, this is different for AI and machine learning. Without enough data, you won’t get a conclusive inference. A focus keyword is a word people are likely to use to search for particular topic areas. When someone is searching for something, they type in search terms directly and straight to the point. The search engine will then match search terms to articles with the same search terms (keywords) littered throughout the post. For instance, if someone was trying to learn about SEO, they may type SEO in the search bar. So having SEO as your focus keyword is vital if you want your website to be displayed. Other keyword tips are;

  • Include the focus keyword in the title
  • Make sure to add it to the meta description of the page or post.
  • Make it a point to mention it throughout the post. For the best results, you should have a 1-2% keyword density. That means the keyword should appear 1-2 times per 100-word copy.
  • The keyword should be included in the permalink of the post or page.


Good User Experience

A website with a bad UI/UX structure is painful to visit. If you want to learn how to create a free blog site, click here
The website you’re trying to drive traffic to must be easy to navigate, and there must be a clear path if you want users to take action. If you want users to book a service, there should be a “Book” button on the home page, while also detailing everything about your business on the same page. If visitors have to click more to find details like pricing or location, they may leave your website without converting. Update your website to remove dead links and error pages from the website.

Not only does this help visitors to your site, but it also allows Google to properly crawl and index your website. A poorly indexed website means that important pages or posts may not display in search results even though they’re relevant to the searcher.


Link Your Socials

In my experience, businesses with both a website and social media accounts notice that their Social media (whether Instagram or Facebook) perform higher on Search Results at the beginning of their operation. That is because Facebook and Instagram are being crawled daily by Google. So anyone searching for your company will see your Social media accounts first. That is not a bad thing, except you want traction on your website. The next course of action is to link your website on your Instagram bio or under every one of your Facebook posts. That way, when people see your social media account pages in the search results, they can go to your website off of that page.


Connect Your Website to the Google Search Console

Another tip to have your website crawled and indexed by Google is to connect your website to the Google Search Console. The Search Console provides analytical tools about your rank on Google Search, search terms that trigger your website, and details about users on your website. Submitting your website to the Search Console is not a shortcut to speed the crawling process but it will help greatly.

There are dozens of other tips for you to improve your website rank on search engines. Stay tuned as we’ll publish more articles on other best SEO practices you should undertake for your website.

Check out this article: Best Practices For a Successful Google Ads Campaign-2022

How to Make Money Online Through Affiliate Marketing – 2022


It can be quite difficult to make money online from running a blog or a website. In some cases, especially for content creators on sites such as YouTube or influencers on Instagram, it’s usually ideal to gain multiple streams of income aside from the wages obtained from these sites. One of the most effective ways to do this is to make money online through affiliate marketing.

Affiliate marketing is a process whereby affiliates or publishers (in this case, bloggers or content creators or influencers) earn money (commission) for marketing a product. Usually what happens is that the affiliate promotes the product and from any sale that is made, they gain a percentage of the profit.

To a large extent, this goes on to benefit both parties; it drives sales and serves as a source of income for the creator. Popular Affiliate Marketing websites include ShareASale, GuruMedia, eBay Partners, etc.


How it works

In order to make money online through Affiliate marketing there need to be three parties in order to be successful. The first is the company or sellers. They are the ones that make or provide the product and also give out a percentage of the profit to the affiliate. The second party is the affiliate. The affiliate is responsible for marketing the product in order to entice their consumers to usually click on a special link that leads to the product. The affiliate essentially serves as a bridge to the product and there are different ways the affiliate could be associated with the product; unattached means the affiliate has very little knowledge about the product, hasn’t used it and therefore cannot offer a detailed analysis of the product; related falls between unattached and involved where even though the affiliate cannot attest to the authenticity of the product (since they don’t use it), their platform is related to that specific product so they can give a general outlook on the product; involved means the affiliate has used the product and can attest to its authenticity.


As established earlier, this works on various media including blogs websites or social networks such as YouTube, Instagram and even WhatsApp. Usually, there is a standard procedure for how affiliate marketing works for different platforms but first, you need to understand that there are different ways in which the affiliate gains a commission from advertising the product. It could be through pay per sale, where the affiliate is paid when the user uses a link on the affiliate’s site to purchase the product, pay per lead, where the user isn’t required to purchase but to either download, fill out forms, subscribe to a newsletter etc. for the affiliate to be paid. Pay per click requires that the link redirects the user from the affiliate’s site to the website of the seller or merchant for the affiliate to be paid and pay per install requires that the user install an app or software before the affiliate is paid.

To make money online through Affiliate Marketing on social media platforms such as Instagram and Facebook or Twitter, the affiliate or publisher markets the product to their followers in a post and usually posts a link associated with such product under the post or in their bio. When the follower clicks the link and performs the necessary requirements the merchant wants, the affiliate gains a commission.

For YouTube, the creator usually advertises the product in the video sometimes even going as far as to show evidence of them using the product and then posts a link in the description box under the video for users to click on.

For WhatsApp, the status feature is perfect for it. The affiliate advertises the product and includes the link in the story. As an added bonus, try to be convincing in order to sell a lot more products to make money online.

For blogs or websites, the link could be posted at an area-usually at the bottom of the page- for readers or visitors to find.

Affiliate marketing is usually ideal for internet content creators because you can make money online passively, where you can be paid at any time. It’s also low risk, as once you get into it, most require fees upfront with no unexpected fees along the way. Some don’t even require fees. On the flip side, however, it takes a lot of time as it requires that you build a large audience in order to gain influence; nevertheless, it’s a great way to create multiple sources of income if you primarily work on the internet. If you want to know other ways to make money online, check out these articles:

4 Ways to Make Money Online in Ghana

Top 3 Link Shorteners You Can Earn Money Online From