

As discussed in a previous article, there are many ways to earn money online. In this article, I’ll be talking about Link Shorteners. These websites shorten your links for you and pay you when people click on that shared link. You don’t need a website to sign up for this service. For example, if you want to share a download Google Drive link to your followers or link them to a YouTube video, you can shorten the link and share it on your page or statuses.
When you share a shortened link and someone clicks on them, they are directed to a page with all kinds of ads in images, texts, and video formats. They will have to wait 5-10 seconds to skip, and then they can access your intended link. The more people click and stay on the shortener for at least 5 seconds, the more percentage cut of the money you earn. Like any human endeavor, be careful of the link Shorteners you choose. Some are fraudulent and may have malware on their site, compromising your visitors’ devices.
This list contains three credible websites that will fetch you some money. Most of these websites payout using PayPal, so if you don’t have a PayPal account and wondering how to create one in Ghana, read this article.
Adf.ly is one of the oldest and most reliable link Shorteners on the internet, and it was the highest-paying Link shortener in 2021. It is considered by many, including me, as one of the most trusting link Shorteners in the world. Their malware security servers and anti-virus are always active 24/7 to protect advertisers and link sharers. Their offers are one of the best in the market; they pay $13 per thousand views(which in my estimation is not bad).
Adshrink.it was founded in 2016 and is now one of the most profitable link shorteners in the world. Over 50 thousand people have signed up for the platform. Publishers will keep 80% of their ad revenue, while the platform will take 20%. If you have a high-traffic website, Adshrink is a good choice. It is the most appropriate choice for you. It’s a well-known network that pays $7.5 per 1,000 visits and never misses a payment. The platform includes a robust analytics tool for tracking your audience’s movements.
You can shorten, distribute, and trace each link with exe.io. The best part of exe.io is that it pays you for every link you create on the spot. You can generate short links with this application, which is free to use. There are no charges, but you can still earn money by using this program. To begin earning, you only need to take three simple steps: make an account first, create a link and post it. You will get paid for each person that clicks on your link. Exe.io also offers the most competitive prices on the market, allowing you to earn a lot of money simply by sending traffic to your links.
Tip: You should not treat this as a full-time job. Think of this as a side hustle that provides you with passive income while working. If you have a large following on your social media, or high traffic on your blog, this is another avenue to earn money online outside of Google AdSense.
Try them out and let us know in the comments how much you are able to earn and what creative strategies you’re employing to earn money online from these link shorteners. Also, do share if you know of other great link shorteners that are not captured above. Cheers!

For various reasons, including making money, most Instagram users have the desire to increase the number of followers on the site. However, it could be difficult considering the rising number of users daily. To make things a little easier for you, here are four tips on how to increase engagement and followers on Instagram.
Avoid fake followers
The first step to increasing your followers is to avoid using underhanded means to gain followers. Usually, these are taken care of by shady companies that require money. Since they have no credentials to determine if these companies are credible or not, it’s easy to lose money or reap very little than promised. In other cases, where you do get your money’s worth, the followers are mostly just bots, and they provide very little in terms of engagements which are essential for driving traffic to your account, especially if you are seeking to promote your business. Even if the bots increase the number of engagements on a post, the comments are usually a dead giveaway that something’s up. It could actually drive away potential followers or customers. If this is not enough to deter you, Instagram could get wind of suspicious activity; the companies usually require access to your login details which alerts Instagram; you might receive a warning or even have your account deactivated. So you might want to lay off the fake followers. In fact, the best way to secure a sustainable following is to engage actual people anyway.
Plan what you want your account to be about.
It’s important to have a set idea as to what you want your Instagram account to entail. People that visit your account should instantly have an idea of what you are about, the instant they do so. You might want to mainly address problems usually associated with your area of interest. People respond more when they realize problems they have could be solved; your posts should reflect that. Whether your page aims to solve problems or you are using the opportunity to brand yourself an influencer, your posts should reflect it.
Specific Aesthetic
Have a specific aesthetic associated with your account; Instagram is a site heavily centered around visuals. What attracts people to check out posts is the layout, and one of the best things to do is to create attractive grids as they are the first parts of your account likely to grab people’s attention. For instance, you might want to choose a specific color scheme to give your page a more coordinated look.
Be consistent
You might want to post pretty often, especially at the beginning. Posting frequently, while using accurate keywords and hashtags is a sure way to get people to acknowledge and follow your account. Avoid using wrong hashtags or using trendy hashtags even though they’re not representative of what you do. This is a major turn-off for most people. Choose days and times you want to post and be diligent about it. It could also ensure that your account is easier to find in searches.
There are definitely more tips to help you gain more followers on Instagram, but for now, these are sure to get you started. Good luck on your Instagram journey. If you have any questions, feel free to ask in the comments
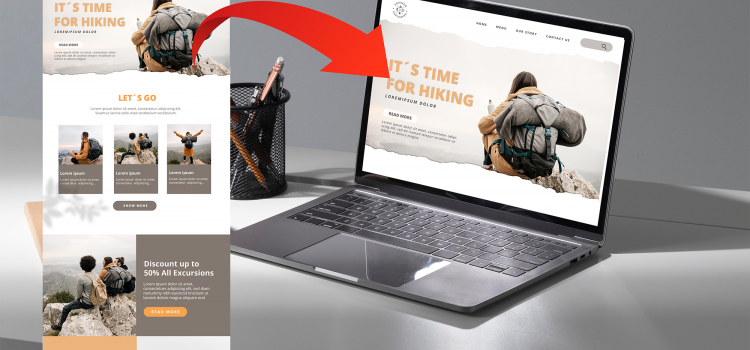

Sometimes, you don’t want to build a website from scratch. Or you’ve seen a theme that fits with your vision for how your website should look. Several sites provide free and paid themes, like Envato and Themeforest. After buying and/or downloading your desired theme, it is easy to install and import demo data in WordPress.
When buying a theme, check that it includes documentation, licenses, and a demo. These will make it easy to import the whole site. Any theme you buy or download will contain all the plugins needed for the theme to function properly.
After buying the theme:
At this point, you have imported your website. Go ahead and customize and personalize it for your business or personal use. You can also use this procedure to install a backup of your website.

YouTube Partners program is one way to make money online in 2022. We have an article on the different means of making money online in 2022. You can check it out here. The YouTube Partners Program is accessible in many countries, including Ghana. This program pays creators for having ads in their videos. These ads are from their Google Ads Program, where businesses pay Google to advertise on their websites, including YouTube. So money made from ads shown on your video is split into 55-45 percent, with the creator receiving 45% and Google 55%. Growing your channel and gaining more views on your channel means more money for you as a creator.
To be eligible for the YouTube Partners Program, the creator must:
To check your monetization eligibility:
Open YouTube Studio, and in the menu options, click on Monetization. Two different screens depending on your eligibility status.
If you’re not yet eligible:
Your screen will help you track the goals you need to reach before being eligible. You’ll be able to see a summary of your current subscribers, watch-time, number of community guidelines strikes, and 2-step verification activation on your channel.
Click on “Notify me when I’m Eligible”, and Google will send you an email when your eligibility status changes.
If you’re eligible:
You’ll see three steps you have to follow to apply for monetization:
Step 1: Review Partner Program Terms
To complete this step, you need to read and accept all of the Partners Program’s Terms and Conditions. You won’t be able to progress if you don’t do this.
Step 2: Sign up for Google AdSense: This is where you connect an existing AdSense account or create a new AdSense account. This AdSense account is the avenue Google will use to pay you for showing ads on your channel.
Step 3: Get Reviewed: Google will review your application and channel in full detail. This review should usually take a month or less, and you’ll receive an email of approval or rejection. Google will tell you the reasons why if disapproved. You can still re-apply after 30 days when you’ve fixed the issues in detail.
If you are approved, you’ll receive an email that will allow you to set up your channel to start the monetization of your channel.
YouTube content creation may be daunting for you in the beginning. All I’ll say is ride it out, make your videos better, be willing to learn, and you’ll see your channel grow as you get better.


If you’ve ever wanted to start a blog website to exhibit your writing skills, then WordPress is the best platform to begin. Other competitors (Blogger and Wix) do not touch WordPress when it comes to customizations, ease of use, and popularity. WordPress powers over 455 million websites on the internet as of 2022, hence you’ll be in great company. In a separate article, I’ll cover the advantages WordPress has over other free blog websites in greater detail. This article will teach you how to create your free blog site and install themes.
Creating Your Blog Site
When your name and password check out, proceed to the next step of choosing your domain name. This is a tutorial for a free website but if you are willing to spend some bucks on a domain name, you can do that.
Now it’s time to set up and install a theme for your blog website. WordPress will install a default theme on your site. If you’re cool with it, you can skip this part. WordPress has a ton of free and premium themes to choose from. To set it up:
In subsequent posts, we’ll look at how to create, edit and publish your first posts. Hopefully, this was able to help you create your website. If you have any questions, feel free to ask in the comments.
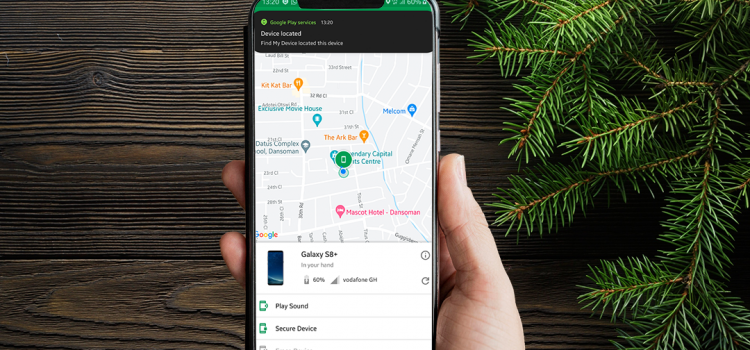

If you’ve had your phone stolen, you know how helpless it feels knowing you can never trace its location. You begin to worry about your important data like documents, IDs, pictures and videos falling into the wrong hands. Not to worry. The Find My Phone app is just the solution for you. I’ll be discussing how to set it up and explore the app in detail.
The Find Device app is an expansive app that allows you to view your phone’s location on another device or PC. The only caveat is it must be online for it to work. If it is off with no internet connection, Google cannot have access to your phone to affect changes. However, Google will take action as soon as the phone comes back online.
Check out this Article: WhatsApp as Notes App?—More Than A Messaging App
For Android:
For PC:
All you need to do is, visit The Google Find Device website here, and sign in (using your Google Account).
The interface displays your phone name with the model and IMEI. It also shows the network carrier and battery percentage. There are three options you can use: Play Sound, Secure Device and Erase Device. The Play Sound option is useful when you cannot recall where you put your phone, but it’s around you. Google will set your phone to ring (your ringtone) as it would receiving a regular phone call. Secure Device and Erase Device are more useful in theft situations, and I’ll talk about them later.
As soon as you sign in to Find Device, Google will initiate a location search for your phone. If the device is online, you should receive a notification saying, “Find My Device located this device.” It will zone in on your location on the map where you can zoom in for the detailed place.
When your phone gets missing, you first need to open the Find Device app or website from another phone or computer and sign in. Once you’re in, check the location and see if you can get there quickly. If not, you may want to secure the device. This will lock the phone and log you out of all app sessions connected to your Google accounts, such as Gmail, Drive and other apps. Google will also display a message or your phone number on the lock screen when someone finds it. If the phone is off, Google will secure your device as soon as it comes back online.
The last and drastic option is the Erase Device option. You can use this option in the case of theft, and you know for sure you are not getting the device back, or Google couldn’t locate it. This will erase everything, including your Google account on that device. When you choose this option, that’s the end. You won’t be able to locate your device ever again. Again, if the device is off, erasure will still occur as soon as it is turned on.
It’s comforting to know that you have a shot at finding your phone. You will never have to worry about losing your information to someone when your phone gets missing. Let us know what you think of this in the comments section.

WhatsApp is a messaging app. Let me get that out the way. What if I told you WhatsApp could be better than, hear me out, the default Notes app on your phone? In this article, I’ll talk about setting it up and the pros of WhatsApp over your Notes app.
Using WhatsApp as your Notes app may sound Ludacris, but it makes perfect sense. Basically, all you’ll be doing is messaging yourself, which feels like a waste of time. WhatsApp doesn’t have this as a feature as of 2022, but there are ways around it.
Things WhatsApp can do that your default Note apps can’t
How to Create A Chat with yourself.
The trick here is to create a contact with your mobile phone number and save it. Allow WhatsApp to re-sync your contacts and check for your phone number. Tap on the floating button to create a new chat and select the new contact. From here, you don’t have to do this every time you need to start a note. You can view the chat from the chat screen
So this method will create a group chat with yourself as the only member. WhatsApp won’t allow you to create a group chat with just you, so you can add at least one of your contacts and then remove them quickly. Once they’re gone, the group will still stand with you being the only participant. You can repeat this method severally if you want to have your notes themed. You can have Reminders, Important, Memes, Recipes, etc., as different groups and use them accordingly. If you want to share a particular theme group with another person, you can add them as a participant.
As of 2020, WhatsApp added a chat link feature that allowed users to start chats with other users. You do not have to have their contact information on your phone to message someone. You can use that to create a chat with yourself. The format for the link is wa.me/phonenumber. Replace the “phone number” with your phone number with your country code. Type this in your browser, and within seconds, WhatsApp will open, creating a new chat with yourself.
WhatsApp can be a free notes app with advantages over many default Note apps and many others in the Store. Be sure to give this a try and let us know in the comments what you think.

The global number one messaging app WhatsApp is rolling out a new feature that will allow users to react to messages in individual and group chats. This feature had already been rolled out in other Meta apps like Facebook and Instagram, and it doesn’t come as a surprise we’re seeing this feature on WhatsApp.
Reactions have become huge in other social media apps over the past few years. Why use words or type emojis to express love for a cute video of a baby your partner sent when you can choose that expression among the list of reactions. This will change how we use WhatsApp from now on.
All you need to do to use a reaction is to long-tap on a message. Six reaction emojis will pop up, and then you can tap on the reaction you want to use. In group chats, there is a reaction count that displays at the bottom of the message bubble. It’ll save time in typing out words to react to messages. You can respond to a funny message with the laughter emoji or agree to vacation plans with a thumbs-up emoji.
The reactions can also serve as a poll tool in group chats. Say a group of friends are having trouble choosing a vacation destination. The group can express their opinion by reacting to messages with positive reactions. Since there’s a count on reactions used, the organizer can then go with what the majority wants.
This modification allows anyone to see precise reactions to each image or video in a gallery without opening the album, in case you missed it in previews. Instead of only displaying the emojis that each user has used, WhatsApp will display a thumbnail for each piece of media that has been liked — all on a single page that exists outside of the gallery.
This wouldn’t be the first time Meta is crossing over features from another of their apps and definitely wouldn’t be the last. The Reactions is a welcome feature on WhatsApp though and I’m looking forward to seeing what more WhatsApp can do with this.


As discussed in a previous article, AdSense is an effective way to make money online for your video content or blog. This article will look at how to link your AdSense account to your blog websites and how to activate ads.
To learn how to sign up for AdSense, check out this article.
If you weren’t approved, go over your website and make sure it meets all the requirements and policies of Google AdSense. Once you do that, you can resubmit your application. Here are some more tips to consider if you weren’t approved:
To activate your AdSense account, you need to add a payment method, verify your phone number and connect your website.
Adding a Payment Method
This is how Google is going to pay you after serving ads.
Phone Verification
This step is for Google users who haven’t verified their number with Google. If you have, just use the same number and skip this process. However, if you want to use another number or do not have a verified Google phone number, follow the steps below:
Connect Your Website
This is the final step in activating your website. Google will display a code on this page:
If you’re using WordPress, all you need is a plugin (Google Sitekit) that will help you add the code without going into the HTML. You can also use the Tracking Code Manager.
Google will try to search your website for the code. If the code is detected, Google will automatically begin the review process. If you were disapproved, you would receive an error message. You would have to check to make sure you pasted the code correctly and in the right place.
For now, your part is done. Google will review your website to confirm that it complies with the Privacy Policies and Terms and Conditions. The review may take a few days to complete. You will receive an email once it is done. After your site has been approved, you can start setting it up and earning money.

Microsoft has been at the end of endless jokes over the last two decades over its internet browsers. Starting from their Internet Explorer days to early Edge days, they are still yet to have a crack at competing with other browsers like Chrome, Mozilla Firefox, and Opera. However, after moving to Chromium, Edge is looking as promising as ever, and I’m going to make a case for why switching to Microsoft Edge may not be a bad idea after all.
Lightweight Edge
The Microsoft Edge, in my experience, uses considerably less RAM than Microsoft. I’ve noticed low-end PCs struggle with loading pages or watching videos using Chrome and have a great experience on Edge. Anything less than 4GB RAM in your pc and Chrome will lag and hamper the performance on your PC. If you want to do some research while working on your thesis, you may encounter issues. Edge is quick, and it does not hog all the RAM space. If you are using a 4GB RAM PC, you may want to consider switching to Microsoft Edge.
Classy Homepage
The Home of the Edge browser is intuitive, informative, and convenient. It displays your most visited websites and news tailored to your interests ranging from pop entertainment to sports and cryptocurrencies. You can customize what type of news you want to see in the settings. You get other timely information like the Weather and other customized content. There’s even a little game where you plant a virtual seed and complete tasks. Once your virtual tree grows, Microsoft will plant a tree in Kenya. Save the earth, use Edge.
Immersive Reader
If you’re an avid reader, whether it’s the news or novels, the Microsoft Edge browser comes with an immersive reader that aims to improve your reading experience. First of all, it will present whatever text you’re reading in an epub format (like an actual book with book-flipping animations). It will also remove clutter like unnecessary images, videos and ads so you can comfortably read the full text. This comes in handy presently due to the absurd influx of ads on the internet. There’s also a Read Aloud mode where an AI will read the entire page as the user wishes. This is a life-changing feature, making researching and reading on the web way easier.
Collection of Ideas
“Collections” is a feature on Microsoft Edge that allows users to save content (images, videos, or full web pages) for later view. It allows you to keep track of web pages or ideas and pick up right where you left off. You can have them themed as well; whether you’re shopping, researching for school, or a series of videos. When you create and name the collection, a simple click on the + button will add multiple pages to that collection. That way, you won’t have to painstakingly scroll through your browsing history looking for one web page among the thousands of pages you visited.
Switching from Chrome to Edge is simple. Microsoft Edge allows you to import your browsing history, passwords, bookmarks, and even Chrome extensions. Since Edge runs on Chromium, the extensions should work seamlessly.
Microsoft Edge is suffering from the effects of first or early impressions. The first impression is a pretty straightforward thing; once it isn’t checked for long periods, people hold on to them as gospel truth. Internet Explorer and early versions of Edge were bad and people have held that opinion for so long they aren’t willing to give it another shot. If you are willing to do it, or if you already use Edge, let us know what your thoughts are in the comments.
Comments